Profile
Showing posts with label Arthur Crowe. Show all posts
Showing posts with label Arthur Crowe. Show all posts
Sunday, June 11, 2017
Curiouz Emo kitty (Exclusive)

♥Scrap Kit & Tube♥
Exclusive tube of me By Arthur Crowe

(I luuuuuurv it ♥)
You can find it over at Creative Misfits Here
No scrap kit used!
♦Font♦
Before the rain

Wednesday, December 7, 2016
Big candy cane

♥Scrap Kit & Tube♥
Hot winter tube By Arthur Crowe
Scrap kit Peppermint Jack By Toxic Desirez
Template 438 By Missy
♦Font♦
Billion Stars
Friday, October 21, 2016
Play by my own rules

♥Scrap Kit & Tube♥
Tube art by Arthur Crowe
No scrap kit

Monday, June 27, 2016
Lick my lollipop

♥Scrap Kit & Tube♥
Tube art by Arthur Crowe
Scrap kit by Melissaz Creationz

Monday, December 21, 2015
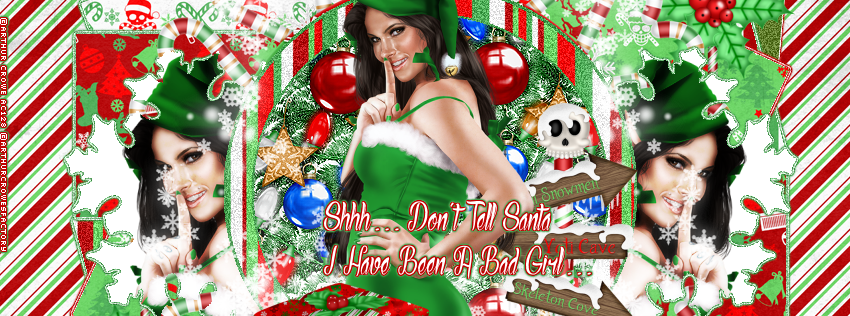
Shhhh don't tell santa

♥Scrap Kit & Tube♥
Noelle tube By Arthur Crowe
Scrap Kit Skullmas Elf By Toxic Dezires
Template 305 By Kristin


Wednesday, June 24, 2015
Grow a vagina

♥Scrap Kit & Tube♥
Tube art by Arthur Crowe (Exclusive)
Scrap kit by Bibis Collection
Tuesday, June 23, 2015
Sunny summer

♥Scrap Kit & Tube♥
Tube art by Arthur Crowe
No scrap kit

Saturday, June 6, 2015
Tropical Summer

♥Scrap Kit & Tube♥
Tropical yellow rock tube By Arthur Crowe
Scrap Kit Bee Bee By Bibi's Collection
Wednesday, June 3, 2015
Yellow Toxic

1800 x 1462
Wallpaper made with the rocking art by Arthur Crowe
Tuesday, October 14, 2014
Perfect Moment

♥Scrap Kit & Tube♥
Tube art by Arthur Crowe (Exclusive)
Toxic Punk 2 scrap kit by Toxic Desirez
Competition

♥Scrap Kit & Tube♥
Tube art by Arthur Crowe (Exclusive)
Black Heartz scrap kit by Toxic Desirez

Monday, March 3, 2014
I will blow you mind

♥Supplies♥
Tube Music Love of Arthur Crowe you can get it Here
Scrap kit Muzik Lovr By Toxic Desirez Here
Template used template 234 by Kristin Here
♦Filter♦
Eye Candy 4 - Gradient Glow
Dsb Flux - Bright noise
Xero - Radience
Vandelee - Unplugged X - Interlace
◄Font►
Sick Capital Vice
Let's start!
Open template and press shift + D to duplicate the template and close the original.
Delete raster 10,copy of raster 10 and copy of raster 4.
Make raster 1 active and open paper 9 and paste as a new layer.
Add some gradient glow in white, then add gradient glow again in a color from the kit.
Width: 3.00 Intensity: 35
Add some bright noise to it as well
settings: Intensity: 35 Mix
Now make raster 8 active and open paper 8 and paste as a new layer.
Add some gradient glow in white, then add gradient glow again in a color from the kit.
Width: 3.00 Intensity: 35
Add some bright noise to it as well
settings: Intensity: 35 Mix
Make copy of raster 8 active and open paper 8 and paste as a new layer.
Add some gradient glow in white, then add gradient glow again in a color from the kit.
Width: 3.00 Intensity: 35
Add some bright noise to it as well
settings: Intensity: 35 Mix
Make raster 7 active and open paper 6 and paste as a new layer.
Add some gradient glow in white, then add gradient glow again in a color from the kit.
Width: 3.00 Intensity: 35
Add some bright noise to it as well
settings: Intensity: 35 Mix
Make copy of raster 7 active and open paper 6 and paste as a new layer.
Add some gradient glow in white, then add gradient glow again in a color from the kit.
Width: 3.00 Intensity: 35
Add some bright noise to it as well
settings: Intensity: 35 Mix
Make raster 6 active and open paper 10 and paste as a new layer.
Add some gradient glow in white, then add gradient glow again in a color from the kit.
Width: 3.00 Intensity: 35
Add some bright noise to it as well
settings: Intensity: 35 Mix
Make copy of raster 6 active and open paper 10 and paste as a new layer.
Add some gradient glow in white, then add gradient glow again in a color from the kit.
Width: 3.00 Intensity: 35
Add some bright noise to it as well
settings: Intensity: 35 Mix
Make raster 3 active and open paper 4 and paste as a new layer.
Add some gradient glow in white, then add gradient glow again in a color from the kit.
Width: 3.00 Intensity: 35
Add some bright noise to it as well
settings: Intensity: 35 Mix
Make copy of raster 3 active and open paper 4 and paste as a new layer.
Add some gradient glow in white, then add gradient glow again in a color from the kit.
Width: 3.00 Intensity: 35
Add some bright noise to it as well
settings: Intensity: 35 Mix
Make raster 5 active and add a new raster layer, flood fill with black.
Open close up of tube of choice and resize it to fit into the layer.
Go to properties and add lunimance legacy.
Then add some radience to it
with this settings:
138 - 24 - 88 - 143
Then add some Interlace
with these settings:
1- 26 - 10 - 17 - 5 - 1
transparency: 0
Screen
Add some gradient glow in white, then add gradient glow again in a color from the kit.
Width: 3.00 Intensity: 35
Add some bright noise to it as well
settings: Intensity: 35 Mix
Make promoted selection active and add a new raster layer, flood fill with black.
Open close up of tube of choice and resize it to fit into the layer.
Go to properties and add lunimance legacy.
Then add some radience to it
with this settings:
138 - 24 - 88 - 143
Then add some Interlace
with these settings:
1- 26 - 10 - 17 - 5 - 1
transparency: 0
Screen
Add some gradient glow in white, then add gradient glow again in a color from the kit.
Width: 3.00 Intensity: 35
Add some bright noise to it as well
settings: Intensity: 35 Mix
Make raster 4 active and open paper 3 and paste as a new layer.
Add some gradient glow in white, then add gradient glow again in a color from the kit.
Width: 3.00 Intensity: 35
Add some bright noise to it as well
settings: Intensity: 35 Mix
←Elements→
Open tube of choice and paste as a new layer on top of raster 4 and duplicate and move the duplicated tube layer to the top.
Then use your selection tool and remove the parts that are sticking out behind and in front of frame until you like how it looks.
Open cassatte and rotate with your free rotate tool, rotate to the right by 24,96.
Open splatter and paste as a background behind your tag, duplicate and mirror,duplicate and flip, duplicate and mirror and duplicate, flip.
Open sparkles and paste as a new layer over your tube.
Open record and paste it behind the cassatte.
Open music heart and paste it on top of raster 4.
Open lollipop and paste it were you like it.
Open speakers and paste as a new layer right behind tube on both left and right side.
Open buttons and paste as a new layer on the end of the tubes legs.

Now add copyright and name and we are done!
Thursday, February 6, 2014
Love tease

♥Supplies♥
I used the tube Queen of hearts By Arthur Crowe Here
Scrap kit used Heatz Dezire by Toxic Desirez Here
Template 222 by Kristin download it on her blog Here
♦Filter♦
Eye Candy 4 - Gradient Glow
Dsb Flux - Bright Noise
◄Font►
Mirella Script
Let's start!
Open template and press shift +D to duplicate and close the original.
Remove raster 10 and copy of raster 10.
Remove raster 11 and copy of raster 11.
Make raster 9 active and open paper 9 and paste as a new layer.
Add some white gradient glow to it, and some bright noise as well.
Make copy of raster 9 active and open paper 9 and paste as a new layer.
Add some white gradient glow to it, and some bright noise as well.
Make raster 8 active and open paper 9 and paste as a new layer.
Add some white gradient glow to it, and some bright noise as well.
Make copy of rater 8 active and open paper 9 and paste as a new layer.
Add some white gradient glow to it, and some bright noise as well.
Make raster 7 active and open paper 1 and paste as a new layer.
Add some white gradient glow to it, and some bright noise as well.
Make copy of raster 7 active and open paper 1 and paste as a new layer.
Add some white gradient glow to it, and some bright noise as well.
Make raster 6 active and open paper 4 and paste as a new layer.
Add some white gradient glow to it, and some bright noise as well.
Make copy of raster 6 active and open paper 4 and paste as a new layer.
Add some white gradient glow to it, and some bright noise as well.
Make raster 5 active and open paper 6 and paste as a new layer.
Add some white gradient glow to it, and some bright noise as well.
Make copy of raster 5 active and open paper 6 and paste as a new layer.
Add some white gradient glow to it, and some bright noise as well.
Make raster 13 active and open paper 10 and paste as a new layer.
Add some white gradient glow to it, and some bright noise as well.
Make raster 2 active and open paper 2 and paste as a new layer.
Make raster 4 active and open tube of choice and paste as a new layer.
←Elements→
Open splatter and paste it behind your tag, duplicate and mirror,
duplicate and flip, duplicate and mirror.
Open frame 3 and paste as a new layer upon raster 8, duplicate and flip.
Make raster 4 active and open Diamondcurtain and paste as a new layer, duplicate and flip.
Open swag and paste it were you want it.
Open sparkles and paste as a new layer on top of tube layer.
Open lights and paste them were you want them.

Now add copyright and name and we are done!
Saturday, February 1, 2014
Love Bug

♥Supplies♥
I used the Angelical heart tube of Arthur Crowe Here
Cute scrap kit Love Bug By Toxic Desirez Here
Template used Vdaytemp1 by Kristin Here
♦Filter♦
Eye Candy 4 - Gradient Glow
Dsb Flux - Bright Noise
Penta.com - Color Dot
Xero - Radience
◄Font►
Jellyka love and passion
Let's Start!
Open template press shift +D to duplicate and close the original.
Start by delete raster 8,copy of raster 8 and copy of raster 1.
Make raster 2 active and open paper 5 and paste as a new layer,
add some gradient glow to it,also some bright noise if you want to.
Make raster 7 active and open paper 10 and paste as a new layer.
Add some gradient glow to it, also some bright noise if you want to.
Make copy of raster 7 active, open paper 10 and past as a new layer,
add some gradient glow to it, also some bright noise if you want to.
Make raster 5 active and open paper 7 and paste as a new layer,
add effect to it by going to effects-plugins - penta.com - color dot
with these settings:
value: 90
distance: 2
color R: 255
color G: 255
color B: 255
add some gradient glow to it, also some bright noise if you want to.
Make copy of raster 5 active and open paper 7,paste as a new layer,
add effect to it by going to effects-plugins - penta.com - color dot
with these settings:
value: 90
distance: 2
color R: 255
color G: 255
color B: 255
add gradient glow to it and some bright noise.
Make raster 4 active and open paper 9 and paste as a new layer,
add effect to it by going to effects-plugins - penta.com - color dot
with these settings:
value: 90
distance: 2
color R: 255
color G: 255
color B: 255
add gradient glow to it and also some bright noise if you want to.
Make copy of raster 4 active, open paper 9 and paste as a new layer,
add effect to it by going to effects-plugins - penta.com - color dot
with these settings:
value: 90
distance: 2
color R: 255
color G: 255
color B: 255
add some gradient glow to it,also some bright noise if you like.
Make copy of raster 1 active and flood fill it with white.
Open the close up of the tube you want to use, and paste it into the rater 1 as a new layer.
Duplicate the close up and go to properties- luminance legacy,
duplicate it, then go to properties again and this time choose screen.
Now go to effects- plugins- penta.com - color dot
with these settings:
value: 90
distance: 2
color R: 255
color G: 255
color B: 255
add gradient glow to it and,some bright noise if you want to.
Now make copy (2) of raster 1 active and flood fill it with white.
Open the close up of the tube, and paste it into the rater 1 as new layer, duplicate the close up and go to properties- luminance legacy.
duplicate it, then go to properties again and this time choose screen.
Now go to effects- plugins- penta.com - color dot
with these settings:
value: 90
distance: 2
color R: 255
color G: 255
color B: 255
Add some gradient glow to it and also some bright noise if you want.
Open tube and paste it as a new layer,add some radience
with these settings:
128 - 50 - 128 - 255
←Elements→
Open word art and paste as a new layer on top of raster 3.
Open sparkles and paste as a new layer on top of the tube.
Open bow 2 and resoze to 20% and paste them were you like.
Open heart scatter and paste behind your tag.
Open rings and paste them in the bottom of your tag.

Add copyright and name and we are done!
Monday, January 27, 2014
Sweet and innocent

♥Supplies♥
I used the gorjuss art of Arthur Crowe get the tubes Here
Scrap kit used Toxik Fairytale by Toxic Desirez Here
Template used template 136 by Millie Here
♦Filter♦
Eye Candy 4 - Gradient Glow
Dsb Flux - Bright Noise
Penta.com - Color Dot
◄Font►
Caramel Nuggets
Let us start!
Open template and press shift +D to duplicate the template and close off the original.
Make layer 1 active and open paper 11 and paste as a new layer.
Make layer 1 active again and add some gradient glow to it in color of choice and add some bright noise to it.
Make layer 3 active and open paper 9 and paste as a new layer.
Make layer 3 active again and add some gradient glow to it in color of choice and add some bright noise to it.
Make layer 4 active and open paper 6 and paste as a new layer.
Make layer 4 active again and add some gradient glow to it in color of choice and add some bright noise to it.
Hide layer 6
Make layer 8 active and add some bright noise to it.
Make layer 9 active and open paper 10 and paste as a new layer.
Make layer 9 active again and add some gradient glow to it in color of choice and add some bright noise to it.
Take a color of choice and flood fill the text.
←Elements→
Open frame 3 and resize to 80% and paste on top of layer 9 as a new layer, use your moving tool to get it were you want.
Open splatter and paste as a new layer behind your tag.
Open swirls and rotate 90% and paste them were you want them.
Open web and paste it behind the frame.
Open leaves and paste as a new layer.
Now you open the tube of choice and paste as a new layer, add copyright and name.

Hope you enjoyed my tutorial.
Monday, September 23, 2013
I'll bite you scream!

*~Supplies Needed~*
Tube of choice i used the gorjuss art of Arthur Crowe you can get the tubes Here
Scrap kit used Webbed by Kristin you can find her amazing kits Here
Template used template 203 by Kristin, you can download it on her blog Here
*~Filter Used~*
Eye Candy 4 - Gradient Glow
Dsb Flux - Bright Noise
Xero - Radience
*~Font Used~*
Blade 2
Let's Start!
Open template and press shift + D to duplicate the template and close the original.
Start by delete raster 3, copy of raster 8, raster 8, and raster9.
Make raster 7 active and open paper 10 resize to 400 x 400 and paste as a new layer,invert and delete.
Add some gradient glow with color of choice with these settings:
Width: 3.00
Soft Corners: 25
Overall Opacity: 100%
Now add some bright noise to the graient glow you just added, with what settings you prefer.
Make copy of raster layer active and use paper 10 again and paste as a new layer,invert and delete.
Add some gradient glow with color of choice with these settings:
Width: 3.00
Soft Corners: 25
Overall Opacity: 100%
Now add some bright noise to the graient glow you just added, with what settings you prefer.
Make raster 6 active and open paper 1 and paste as a new layer,invert and delete.
Add some gradient glow with color of choice with these settings:
Width: 3.00
Soft Corners: 25
Overall Opacity: 100%
Now add some bright noise to the graient glow you just added, with what settings you prefer.
Make copy of raster layer 6 active and open paper 1 and paste as a new layer,invert and delete.
Add some gradient glow with color of choice with these settings:
Width: 3.00
Soft Corners: 25
Overall Opacity: 100%
Now add some bright noise to the graient glow you just added, with what settings you prefer.
Make raster 5 active and open paper 3 and paste as a new layer,invert and delete.
Add some gradient glow with color of choice with these settings:
Width: 3.00
Soft Corners: 25
Overall Opacity: 100%
Now add some bright noise to the graient glow you just added, with what settings you prefer.
Make copy of raster layer 5 active and open paper 3 and paste as a new layer,invert and delete.
Add some gradient glow with color of choice with these settings:
Width: 3.00
Soft Corners: 25
Overall Opacity: 100%
Now add some bright noise to the graient glow you just added, with what settings you prefer.
Make raster 4 active and open paper 5 and paste as a new layer,invert and delete.
Add some gradient glow with color of choice with these settings:
Width: 3.00
Soft Corners: 25
Overall Opacity: 100%
Now add some bright noise to the graient glow you just added, with what settings you prefer.
Make copy of raster layer 4 active and use paper 5 again and paste as a new layer,invert and delete.
Add some gradient glow with color of choice with these settings:
Width: 3.00
Soft Corners: 25
Overall Opacity: 100%
Now add some bright noise to the graient glow you just added, with what settings you prefer.
Make copy of raster layer 1 active and add a new raster layer and flood fill with the color you prefer, take a part of the tube you are going to use for you tag, and paste into it.
Then right click the layer, and go to properties - luminance legacy.
add some radience to it with these settings: 138 - 20 - 39 - 200
Add some gradient glow with color of choice with these settings:
Width: 3.00
Soft Corners: 25
Overall Opacity: 100%
Now add some bright noise to the graient glow you just added, with what settings you prefer.
Make copy (2) of raster layer 1 active and add a new raster layer and flood fill with the color you prefer, take a part of the tube you are going to use for you tag, and paste into it.
Then right click the layer, and go to properties - luminance legacy.
add some radience to it with these settings: 138 - 20 - 39 - 200
Add some gradient glow with color of choice with these settings:
Width: 3.00
Soft Corners: 25
Overall Opacity: 100%
Now add some bright noise to the graient glow you just added, with what settings you prefer.
Make raster 2 active nad open paper 6 and paste as a new layer,invert and delete.
Add some gradient glow with color of choice with these settings:
Width: 3.00
Soft Corners: 25
Overall Opacity: 100%
Now add some bright noise to the graient glow you just added, with what settings you prefer.
~*Elements*~
Make raster 3 active and open string and paste as a new layer.
Open frame 1 and resize 430 x430 and paste as a new layer on top of the webbed string layer.
Open tube you are going to use and paste as a new layer behind the frame, duplicate and move the other part to the top, invert and delete. Use you selection tool to remove parts out side the frame on the top layer.
Open splatter and paste behind your tag, duplicate,mirror,duplicate,flip,duplicate and flip.
Open sparkles and paste as a new layer on top of your tube layer.
Open bat and resize to 40% and paste it were you like it.
Open flame and resize by 50% and flip it to the left and paste it behind your star frames, duplciate and mirror.
Open lightning rezie by 50% and paste it were you want it, duplicate and mirror.
Open rose resize by 50% and paste them were you want it.
Open wire and paste as a new layer on top of raster 5 duplicate,mirror.
Add the words "I'll bite you scream"
Add copyright and tagname and we are done!

Hope you enjoyed my tutorial☺
Written by Mel 23 Sept 2013
Sunday, September 15, 2013
Little Boo

*~Supplies Needed~*
Tube of choice i am using the art of Arthur Crowe you can buy Here
(Please do not use this tube without a license to do so!!!)
Scrap Kit used "Silly Monsters 2" By Toxic Desirez you can find the kit Here
Template 185 By Kristin Here
*~Filter Used~*
Xero
Unplugged X
EyeCandy4000
*~Font Used~*
Amal
Let us start!
Open up the template shift + d to duplicate it and close out the original.
Make top rectangle active and open paper 13 and paste as a new layer.
Make bottom rectangle active and open paper 13 and paste as a new layer.
Make top square active and open paper 12 and paste as a new layer.
Make bottom square active and open paper 12 and paste as a new layer.
Make black top rectangle active and open paper 14 and paste as a new layer.
Make black bottom rectangle active and open paper 14 and paste as a new layer.
Make circle active and open paper 6 and paste as a new layer.
Make rectangle active and open paper 20 and paste as a new layer.
Open filmstrip and add a new raster layer and flood fill with white and
move to bottom.
Open tube and take 4 parts of the tube and paste into the filmstrip.
Merge all tube layers down and go to properties and choose luminance legacy
duplicate, choose soft light.
Go to the white layer and go to vanderlee - unplugged x - interlace
with these settings:
1-50-50-10-50
Normal
Then on both tube layers
go to xero- radience
With these settings:
128-50-128-255
Open wordart 1 and paste as a new layer on top of circle layer.
Open swirl 1 resize to 70% paste on top of bottom square layer
duplicate and mirror it.
duplicate again and flip and duplicate and mirror.
Open web resize to 63% and paste it on top of rectangle.
duplicate and mirror it, duplicate adn flip and duplicate and mirror.
Open sparkles and paste as a new layer on top of rectangle.
Open frame 4 and resize to 90% and paste as a new layer on top of circle.
Open flame paste on top of rectangle duplicate and mirror it.
Open claws resize to 55% and paste on top of circle.
Open tube of choice and and paste as a new layer.
Add copyright and signature and we are done☺

Written by Mel 15 Sept 2012
Saturday, August 24, 2013
Pretty Punk

♥Scrap Kit & Tube♥
Tube art by Arthur Crowe
Toxik Emo scrap kit by Toxic Desirez

Friday, August 16, 2013
Queen

♥Scrap Kit & Tube♥
Tube art by Arthur Crowe
Bitch Barbie scrap kit by Toxic Desirez
Saturday, May 11, 2013
Imagen story

♥Scrap Kit & Tube♥
Tube art by Arthur Crowe
No scrap kit

Subscribe to:
Posts
(Atom)